Sandwiching and Quilting – Stars of the Forest QAL for a Cause 2020

So you’ve got your quilt all cleaned up- threads snipped, paper pulled, and all the blocks/sashing assembled? Now it’s time to sandwich and start quilting!

I use spray glue to baste my quilts. My favorite method (when the weather is nice) is to go outside and use the garage door. I do this for two reasons- First, it’s the smoothest wall surface I have outside, and second, it’s outside so rain helps clean up any over-spray. (I did this in the garage one winter, and it took FOREVER to get all the sticky residue off the floor and wall!)

I prefer wall basting to floor basting because gravity helps keep things in line. This seriously took me about 5 minutes to baste, and I was working alone. (I need an extra pair of hands for larger quilts!) I learned this method from this YouTube video. Thank you Sharon!

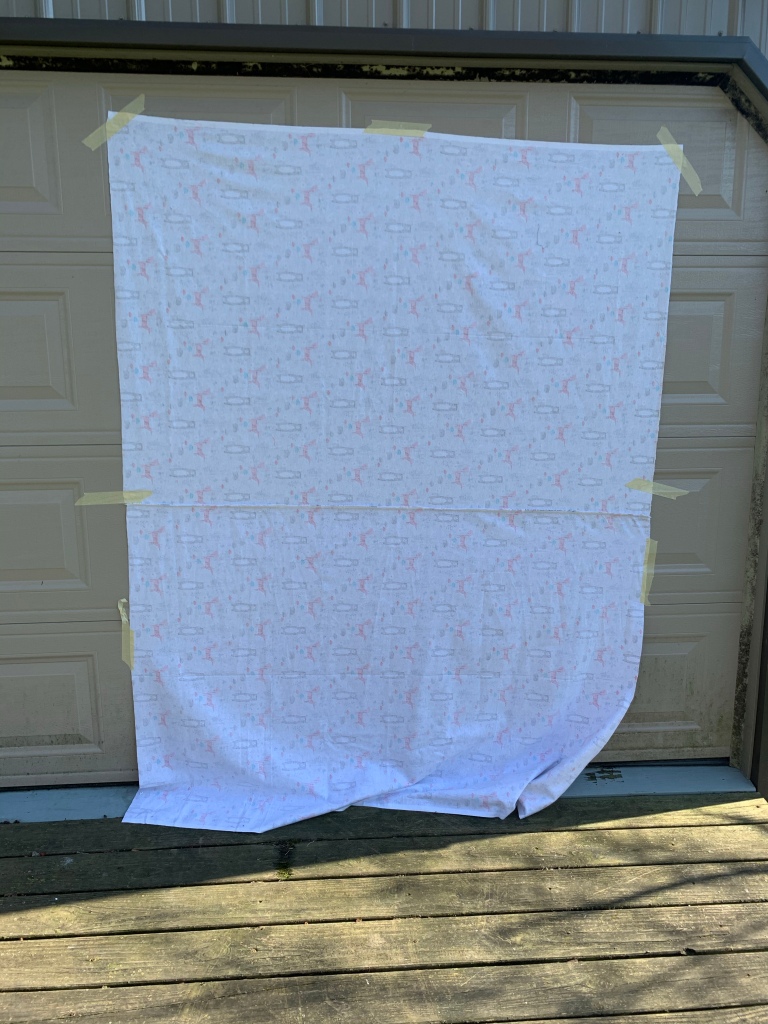
To start- Make sure you have a backing and batting piece that is several inches wider and longer than your finished quilt. (You’ll see in the next photos that I am lazy about trimming before basting!) If you have directional backing fabric, make sure you know which way your fabric and tops need to lay, and then use masking tape to tape the backing as flat as possible to the garage door (or wall, or floor, or table, etc)

Next- spray baste the area that your batting will lay, and try to smooth out at many wrinkles as possible. (This is part way through the smoothing process!)

My backing fabric is running side to side, and my batting is the right width, but too long, so that’s why the excesses aren’t going the same direction. Again, I am lazy about pre-trimming, so I just work with the excess and trim it as I take it off the wall.

Next, coat the batting in a spray glue and smooth the top across the batting, working out all the wrinkles. Spray glue is awesome because you can lift and re-adjust the fabric for a few minutes before it looses it’s tacky feeling- this makes it extra easy to get everything perfect.

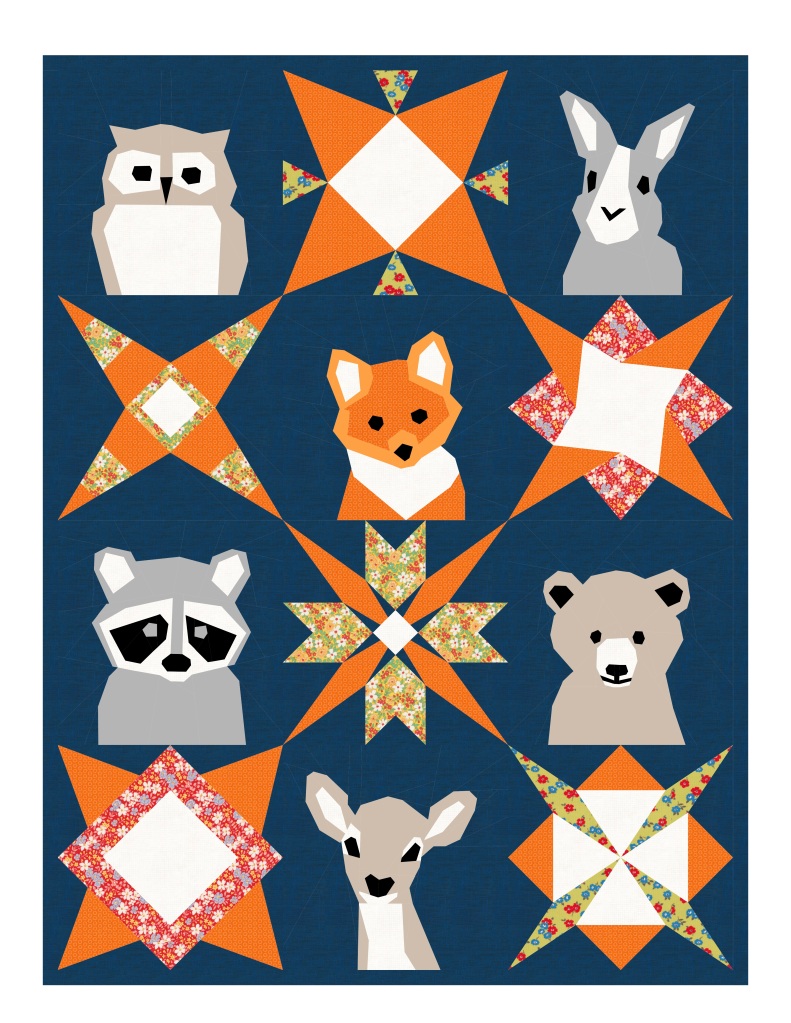
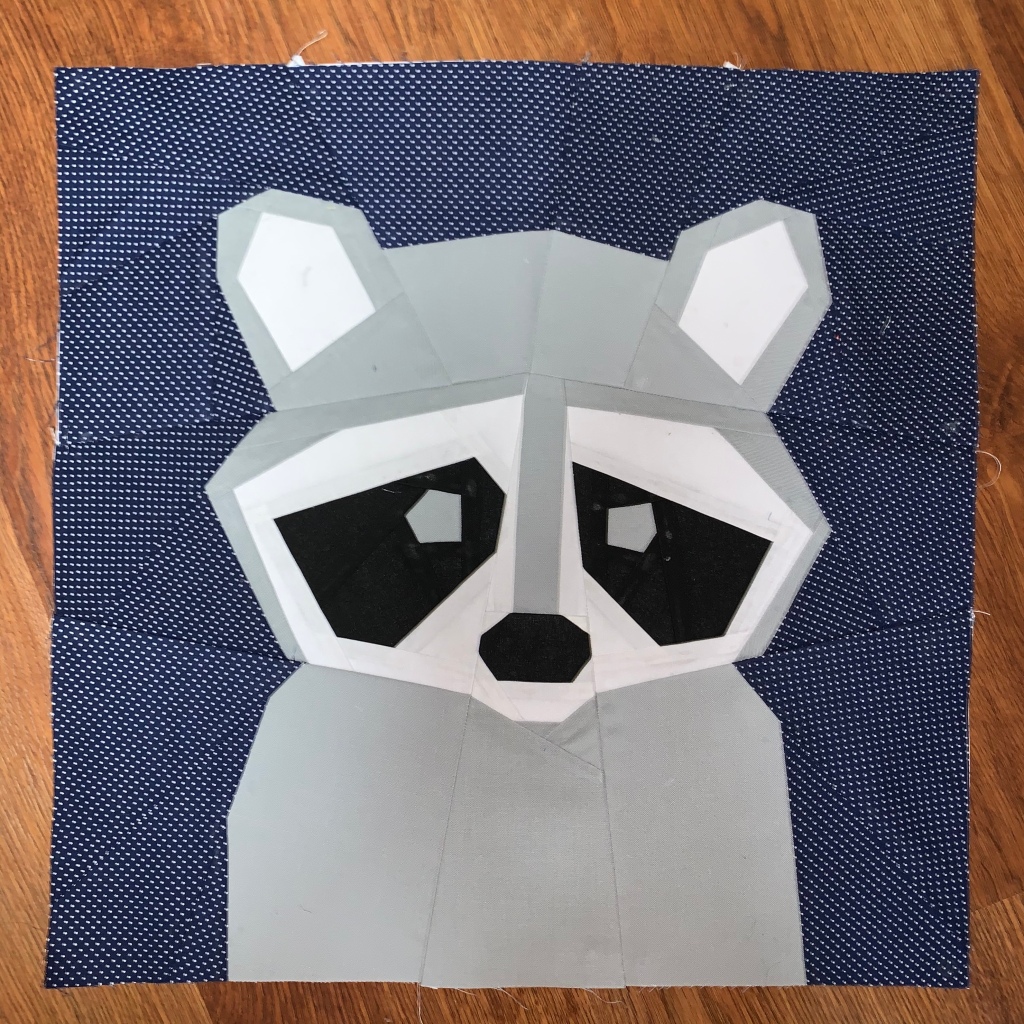
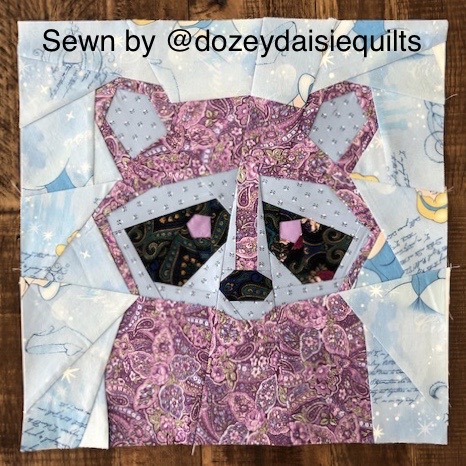
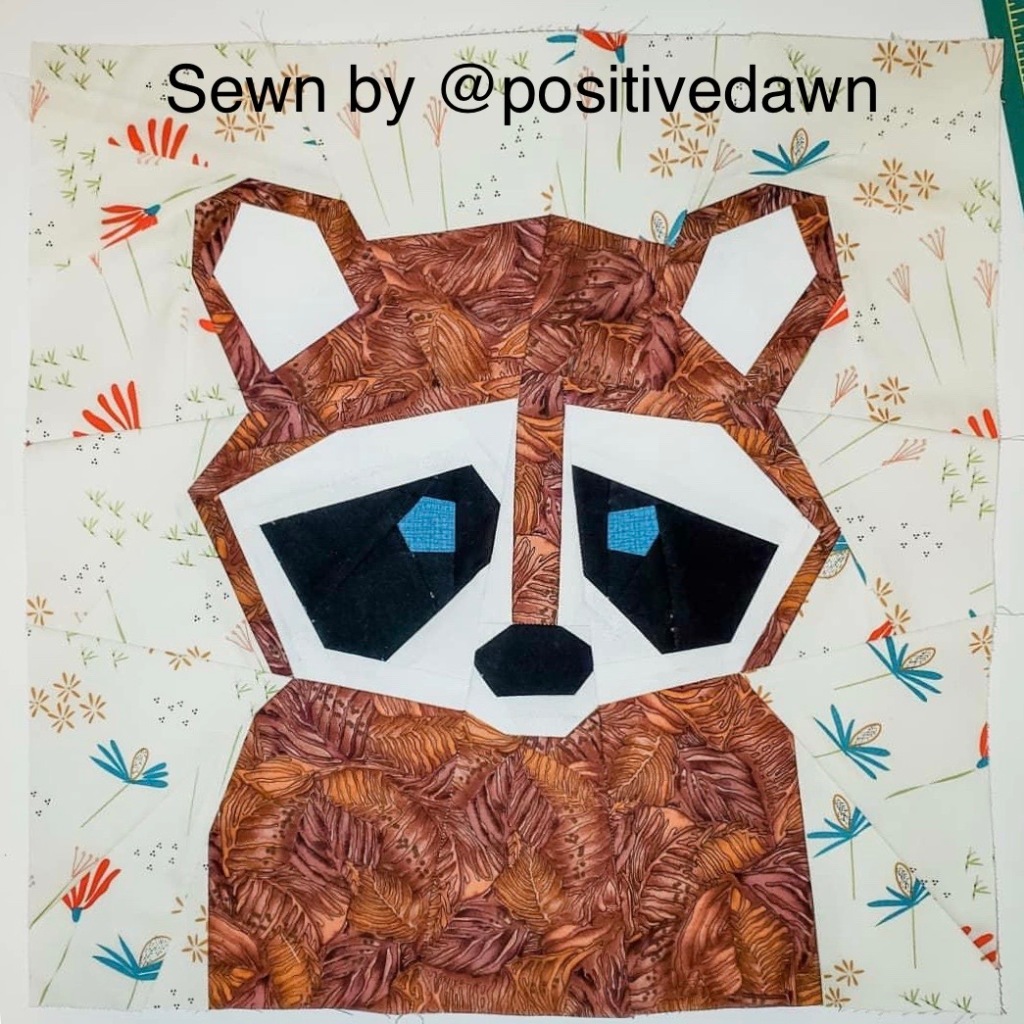
This is much easier to do working WITH gravity- So for my quilt, I smoothed the column that includes the owl and raccoon, and then worked my way across the quilt to the other edge. Then I cut the excess off leaving a few inches on all sides.

Next, I took chalk my longest quilting ruler and chalk marked my quilting lines. (I skip this step if I’m doing something like straight all-over parallel lines or am free motion quilting.)

Once I’ve got my bobbins filled and my machine threaded, I switch my foot to my preferred quilting foot. If I were doing free motion quilting, I would use the foot on the right. I decided to use a walking foot (back left foot) since this is straight-line quilting. Your feet attachment might look different depending on your machine. Refer to your machine’s instruction manual if you need guidance.

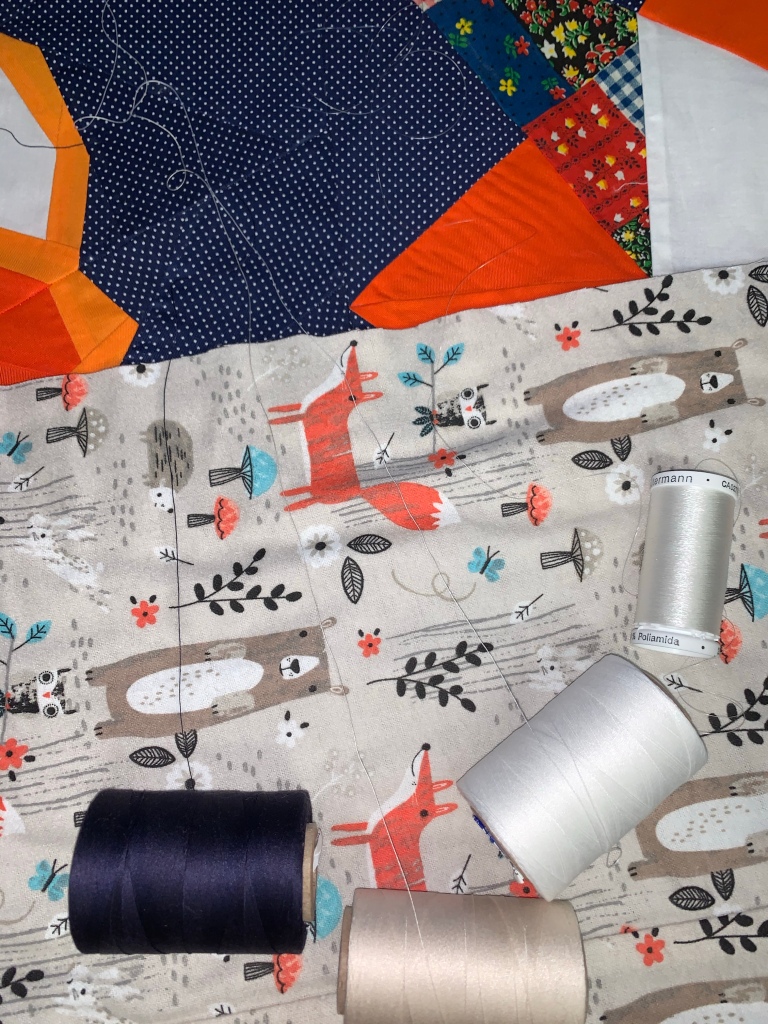
Now I’ll audition threads. I decided to play with the invisible thread (right). This is a new tool for me, and I’ve enjoyed using it with FPP patterns, as it allows the quilting to not be distracting over the FPP images. For my bobbin thread, I selected the off-white.

Thread your machine and make yourself a practice quilt sandwich using scraps from the sandwiching phase (about 6″x6″ big) to test your machine’s tension settings, and to make sure you like the thread on your fabric. Now sew until you’re happy with your stitches. If you are doing free motion quilting, you may want a larger practice sandwich to really get the feel for your quilting.

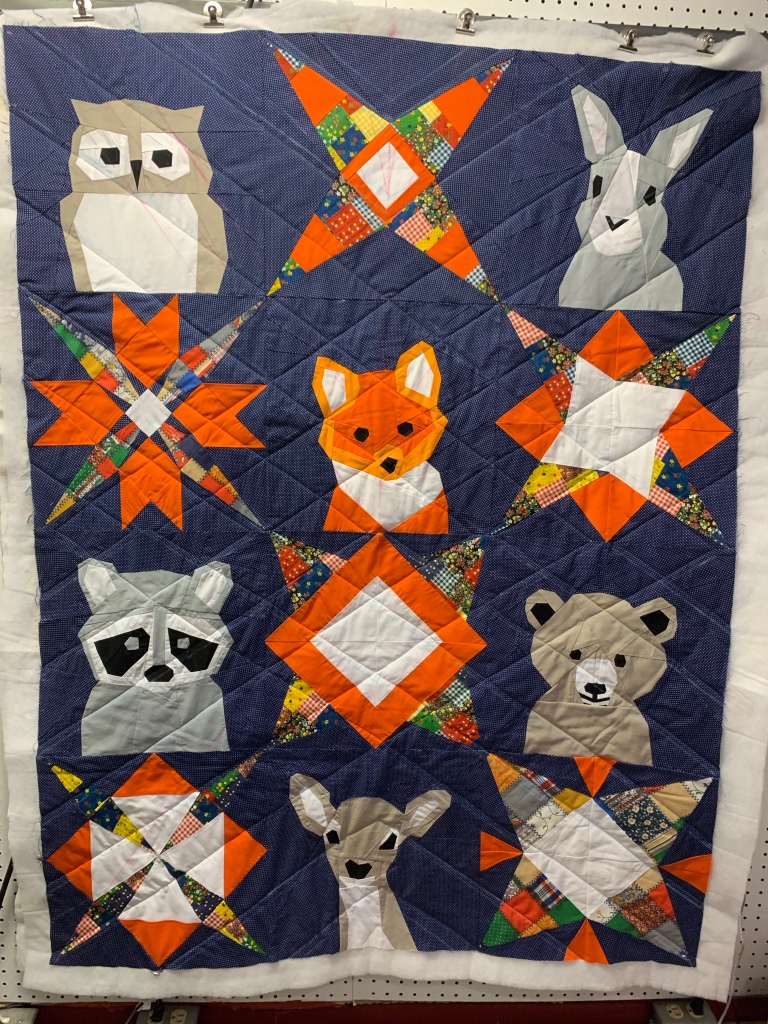
And the quilting is all done! I used this pin from Pinterest to inspire my walking foot quilting design. (Walking foot quilting is by far my favorite method. It takes little time once you have a plan, and the results always turn out great, unlike when I do my own free motion quilting.)

Here’s a close up on the back!

Don’t forget- once you have your quilt finished, please share using the QAL hashtags or #StarsOfTheForest!

Not a fan of my quilting, but looking for some other walking foot quilting? Here’s my own Pinterest reference of walking foot quilting. Sometimes if I can’t get an idea of what it will look like, I take a photo of the quilt and doodle on it using the edit mode on my phone. It’s ugly, but it gives a rough idea.

Ready to Mail? – Stars of the Forest QAL for a Cause 2020

So you’re all done (or you are wanting to send an unfinished quilt top, which The Wrap Them In Love Foundation DOES accept!)

Firstly- Make sure you snap some great photos of your quilt, you know we are all dying to see your finished product! 

Secondly- Add a label, if you’d like (the foundation accepts labeled or unlabeled quilts!)

Third – Please be sure to put your return address written clearly on the box and put a paper with “TO” and “FROM” information inside the package. Nobody wants that quilt to go missing in the mail!

Lastly- Address the box to:

Wrap Them in Love
2522-A Old Hwy 99 South
Mt. Vernon, WA  98273
USA

(If you are local, they accept quilts as in-person drop offs, as well!)

If you are donating somewhere besides The Wrap Them In Love Foundation, PLEASE contact them to be sure they will accept the quilt you have made. Many are very particular, and that is part of the reason I selected The Wrap Them in Love Foundation. 

Week #13 – Assembling the Top – Stars of the Forest QAL for a Cause 2020

As I said last week, don’t expect any more videos for this QAL. I just don’t have the space to lay out the blocks in a way that makes sense on camera! (You’ll see from the awkward photos I’ve included below.)

I also know we have a few newer quilters in this QAL, so I wanted to cover the basic steps for putting all the blocks together, as well as my favorite tips for removing the paper! I’ll post again in a few days for tips for sandwiching the quilt and quilting, but I wanted to offer assistance in getting you started.

Firstly, decide what order you’re going to assemble the blocks. The same as the original image I sent of the finished quilt, or do you have your own layout in mind? Once you have them decided, I like to arrange them out so that I don’t goof and sew the wrong block in the wrong place (or upside down!)

Sew each row of blocks together, forming 4 rows of 3. (You’ll do this by sewing two blocks together, ironing them open, and then sewing the third block on the end. Make sure as you sew that the ‘right’ side of your blocks are facing each other!) If you haven’t removed your paper, you can use a straight pin and glue to baste them precisely in place, or you can remove the paper prior to assembly and sew using a scant 1/4″ seam. (Whichever you are more comfortable doing!)

Once all 4 rows are assembled, I’d recommend ironing all the seams you’ve just sewn in opposite directions. (ie row #1 & #3 seams lay to the right, row #2 & #4 seams lay to the left) This helps the seams to ‘nest’ and line up easier.

Now sew row #1 to #2, and #3 to #4, and then sew Rows #1/2 to #3/4, iron everything flat, and you’ve got a quilt top assembled!

If you haven’t removed paper yet, now is the time to spend several hours picking paper off the back of your quilt. This is greatly aided by a blunt instrument (my favorite for this is the “Purple Thang”, but before I owned it I used a mechanical pencil or blunt tweezers!) My method is to lift the corner of each piece with my instrument, pull the paper with my non-dominant hand, and then put it in the waste basket at my side. If I have paper that is stuck too well with glue, or just generally difficult to remove, I’ll use a q-tip or spray bottle and plain water to help lift it!

I do NOT recommend spraying the entire quilt with water- only because your run the risk of your printer ink running and staining all your hard work. (I speak from experience!) Use the method *after* you’ve already gotten most of the paper off and you’re struggling with glue and/or paper in spots and seams.

I’ve also used my spray-starch method- I spray starch the front of the block, iron with a large hot iron, and then flip it over and pull the paper while it’s damp. This method works for me for individual blocks, but is ungainly to do with an entire assembled quilt.

And that’s it! You’re now ready for sandwiching and quilting! (I’ll post about no later than next week!)

Week #12 – Bear – Stars of the Forest QAL for a Cause 2020

Here it is! The last block of our Stars of the Forest – Quilt Along for a Cause 2020. Next week we start assembling the quilt!

I was going to give you the usual facts about bears, but tomorrow afternoon I bury my grandfather. It seemed so fitting- he was nicknamed “Fuzzy” by his softball team when I was a kid. I can remember him rubbing his short fuzzy hair as he would sing-song “Fuzzy Wuzzy was a bear, Fuzzy Wuzzy had no hair, Fuzzy Wuzzy wasn’t fuzzy, was he?” And it may seem stupid, it may make no sense, but I can’t stop thinking about the serendipity of the timing of this block’s release.

As always, see the assembly explained in a video below!

Did you know a group of bears is called a sleuth? Well look at the sleuth my pattern testers assembled!

Please share photos of your finished block so we can build our quilt along community! #StarsoftheForestQAL #QALforaCause20 #StarsoftheForest

If you are joining after the Quilt Along has already gotten started, you can purchase your copy of this week’s pattern from Etsy.

If you enjoyed this post check out the Stars of the Forest – Quilt Along for a Cause 2020 hub!

There are a few tips for you in the video, however having already put out my Learn Foundation Paper Piecing segment I am trying not to repeat myself 30 times each week. If you aren’t sure how to get started, that’s the place to go!

Week #11 – Star VI – Stars of the Forest QAL for a Cause 2020

Sorry this is a little later than normal this week- Coronavirus strikes again! My own work schedule for the hospital has altered how my week flows.

As before, there just aren’t a lot of fun tidbits about stars- except they routinely inspire emotions. Almost every culture is fascinated with stars as they float above our heads, winking and shining. Most people think of hope, wonder, majesty, or some other similar word when they look at the stars. I don’t know about you, but I could do with a little hope & wonder!

Here are some photos from some great pattern testers!

I hope you are staying well, and enjoying some quiet time with those you love doing the things you love!

As always, I’ve added a video. I’m trying something different with this one- let me know if the super short is helpful or not!

Please share photos of your finished block so we can build our quilt along community! #StarsoftheForestQAL #QALforaCause20 #StarsoftheForest

If you are joining after the Quilt Along has already gotten started, you can purchase your copy of this week’s pattern from Etsy.

If you enjoyed this post check out the Stars of the Forest – Quilt Along for a Cause 2020 hub!

There are a few tips for you in the video, however having already put out my Learn Foundation Paper Piecing segment I am trying not to repeat myself 30 times each week. If you aren’t sure how to get started, that’s the place to go!

Week #10 – Deer – Stars of the Forest QAL for a Cause 2020

Here it is! We’re on the last row of our Stars of the Forest – Quilt Along for a Cause 2020. After this block, we’ll be down to two! This week we are working on a deer.

My grandmother used to take the best photos of deer while working the front gate at a nearby state park. Deer are always portrayed as majestic, silent creatures, however they can also be loud, bumbling oafs, and I think that’s one reason I’ve always liked them. They taste good, they’re regal and goofy, and they’re crazy common in my neck of the woods. Indiana grows some of the largest Whitetail Deer (probably their high corn diet!) You can’t have a North American forest without deer!

Check out the herd my brilliant pattern testers helped me assemble!

Please share photos of your finished block so we can build our quilt along community! #StarsoftheForestQAL #QALforaCause20 #StarsoftheForest

If you are joining after the Quilt Along has already gotten started, you can purchase your copy of this week’s pattern from Etsy.

If you enjoyed this post check out the Stars of the Forest – Quilt Along for a Cause 2020 hub!

There are a few tips for you in the video, however having already put out my Learn Foundation Paper Piecing segment I am trying not to repeat myself 30 times each week. If you aren’t sure how to get started, that’s the place to go!

Week #9 – Star V – Stars of the Forest QAL for a Cause 2020

Last week we had another fun giveaway, but don’t fret- you’ve still got a few weeks to catch up before there’s another! Sue, as always, made a gorgeous surprise bag of lovely low volume prints from her shop, Fabric Gypsies. If you’re like me, you like to support the small fabric shops (even if they’re not local to you!). Check out Fabric Gypsies shop next time you’re in the market for fabric. (Are people never not in the market for fabric..?)

There just aren’t very many fun tidbits to teach you about stars, not like the critter blocks, so I’ll just keep treating them as a catch-up week!

Here are some photos (Aren’t pattern testers the most amazing people?!)

I don’t know about you, but I needed a catch-up week. The last 7 days have been quite the intense run of days. My grandfather was admitted to the hospital (thankfully he’s back at the nursing home and doing well! We were able to FaceTime today and that was great!) My husband’s family has had their own set of obstacles. I finally lost enough weight to go back to our fertility specialist. (Terrifying and super exciting!) I feel like a giant ball of nerves, and it doesn’t help that I am getting the same anxious urgency I get towards to end of my quilt projects- gotta get this done, gotta wrap this up, gotta move on to the next thing. So my goal has been to enjoy the last few weeks of fun and not stress about it! What about you?

Please share photos of your finished block so we can build our quilt along community! #StarsoftheForestQAL #QALforaCause20 #StarsoftheForest

If you are joining after the Quilt Along has already gotten started, you can purchase your copy of this week’s pattern from Etsy.

If you enjoyed this post check out the Stars of the Forest – Quilt Along for a Cause 2020 hub!

There are a few tips for you in the video, however having already put out my Learn Foundation Paper Piecing segment I am trying not to repeat myself 30 times each week. If you aren’t sure how to get started, that’s the place to go!

Week #8 – Raccoon – Stars of the Forest QAL for a Cause 2020

Raccoons are such controversial creatures. If you’ve never met one, they’re delightful, adorable, intelligent critters worthy of any woodland themed quilt. If you’ve ever met them, especially the ones who’ve lost their fear of humans, you’ll probably not love this cute little mammal so much.

I have a friend who’s family actually raised an orphan raccoon they found- it never did stop biting, hissing, scratching, and acting generally ungrateful for the food and warmth (and attempted friendship) her family gave. (I do have to say I do not condone raising orphan animals, and had I known her at the time I would have recommended she call the DNR for an appropriate rehabilitator.)

So, although they’re not pets, they are definitely still too adorable to be excluded, so without further ado- the Raccoon Portrait!

Here are some photos (Huge thanks to all of my stupendous pattern testers!)

Please share photos of your finished block so we can build our quilt along community! #StarsoftheForestQAL #QALforaCause20 #StarsoftheForest

If you are joining after the Quilt Along has already gotten started, you can purchase your copy of this week’s pattern from Etsy.

If you enjoyed this post check out the Stars of the Forest – Quilt Along for a Cause 2020 hub!

There are a few tips for you in the video, however having already put out my Learn Foundation Paper Piecing segment I am trying not to repeat myself 30 times each week. If you aren’t sure how to get started, that’s the place to go!

Week #7 – Star IV – Stars of the Forest QAL for a Cause 2020

This is such an easy and simple star- creating the perfect opportunity to catch up a bit if you’ve fallen behind with the more difficult rabbit last week! I don’t have any fun tidbits to ramble on about this week, so just reading the blog and watching the video are ALSO extra fast this week!

Here are some photos (Huge thanks to all of my stupendous pattern testers!)

Please share photos of your finished block so we can build our quilt along community! #StarsoftheForestQAL #QALforaCause20 #StarsoftheForest

If you are joining after the Quilt Along has already gotten started, you can purchase your copy of this week’s pattern from Etsy.

If you enjoyed this post check out the Stars of the Forest – Quilt Along for a Cause 2020 hub!

There are a few tips for you in the video, however having already put out my Learn Foundation Paper Piecing segment I am trying not to repeat myself 30 times each week. If you aren’t sure how to get started, that’s the place to go!

Week #6 – Rabbit – Stars of the Forest QAL for a Cause 2020

It’s Week #6! Once you’ve wrapped up your block, pat yourself on the back- you’re officially half way done!

There are lots of sharp angled sections on this block, so it’s the hopportune time to hone your skills! (If this makes you nervous, check out the video below to see a walk-through on assembling your block.) FYI for those of you that skip the video – don’t forget to check the assembly instructions. The rabbit’s assembly does not start with Section A!

I love rabbits, and I’m so glad that I was able to include one on the Stars of the Forest pattern. As a kid, we actually owned a few 4-H show rabbits. I owned two Mini Rex, one in a pretty copper color called “castor”, and one’s coloring was “opal” which was a lovely shade of gray. The copper one was one of my favorite pets growing up, she was a little bit like a dog. I could set her free in the yard and she would hop around after me. She even came when I called! If you’ve never fed a rabbit a dandelion stem first, you don’t know what you’re missing out on. They chomp up the stem like a spaghetti noodle, and then inhale the flower. She was ear-resistible.

I’d make some more rabbit jokes, but nobunny would carrot all, instead, check out these lovely renditions from my pattern testers!

Please share photos of your finished block so we can build our quilt along community! #StarsoftheForestQAL #QALforaCause20 #StarsoftheForest

If you are joining after the Quilt Along has already gotten started, you can purchase your copy of this week’s pattern from Etsy.

If you enjoyed this post check out the Stars of the Forest – Quilt Along for a Cause 2020 hub!

There are a few tips for you in the video, however having already put out my Learn Foundation Paper Piecing segment I am trying not to repeat myself 30 times each week. If you aren’t sure how to get started, that’s the place to go!